Free U.S. Continental Shipping on orders $35+ ● No Sales Tax outside California

Free U.S. Continental Shipping on orders $35+ ● No Sales Tax outside California
$48.95
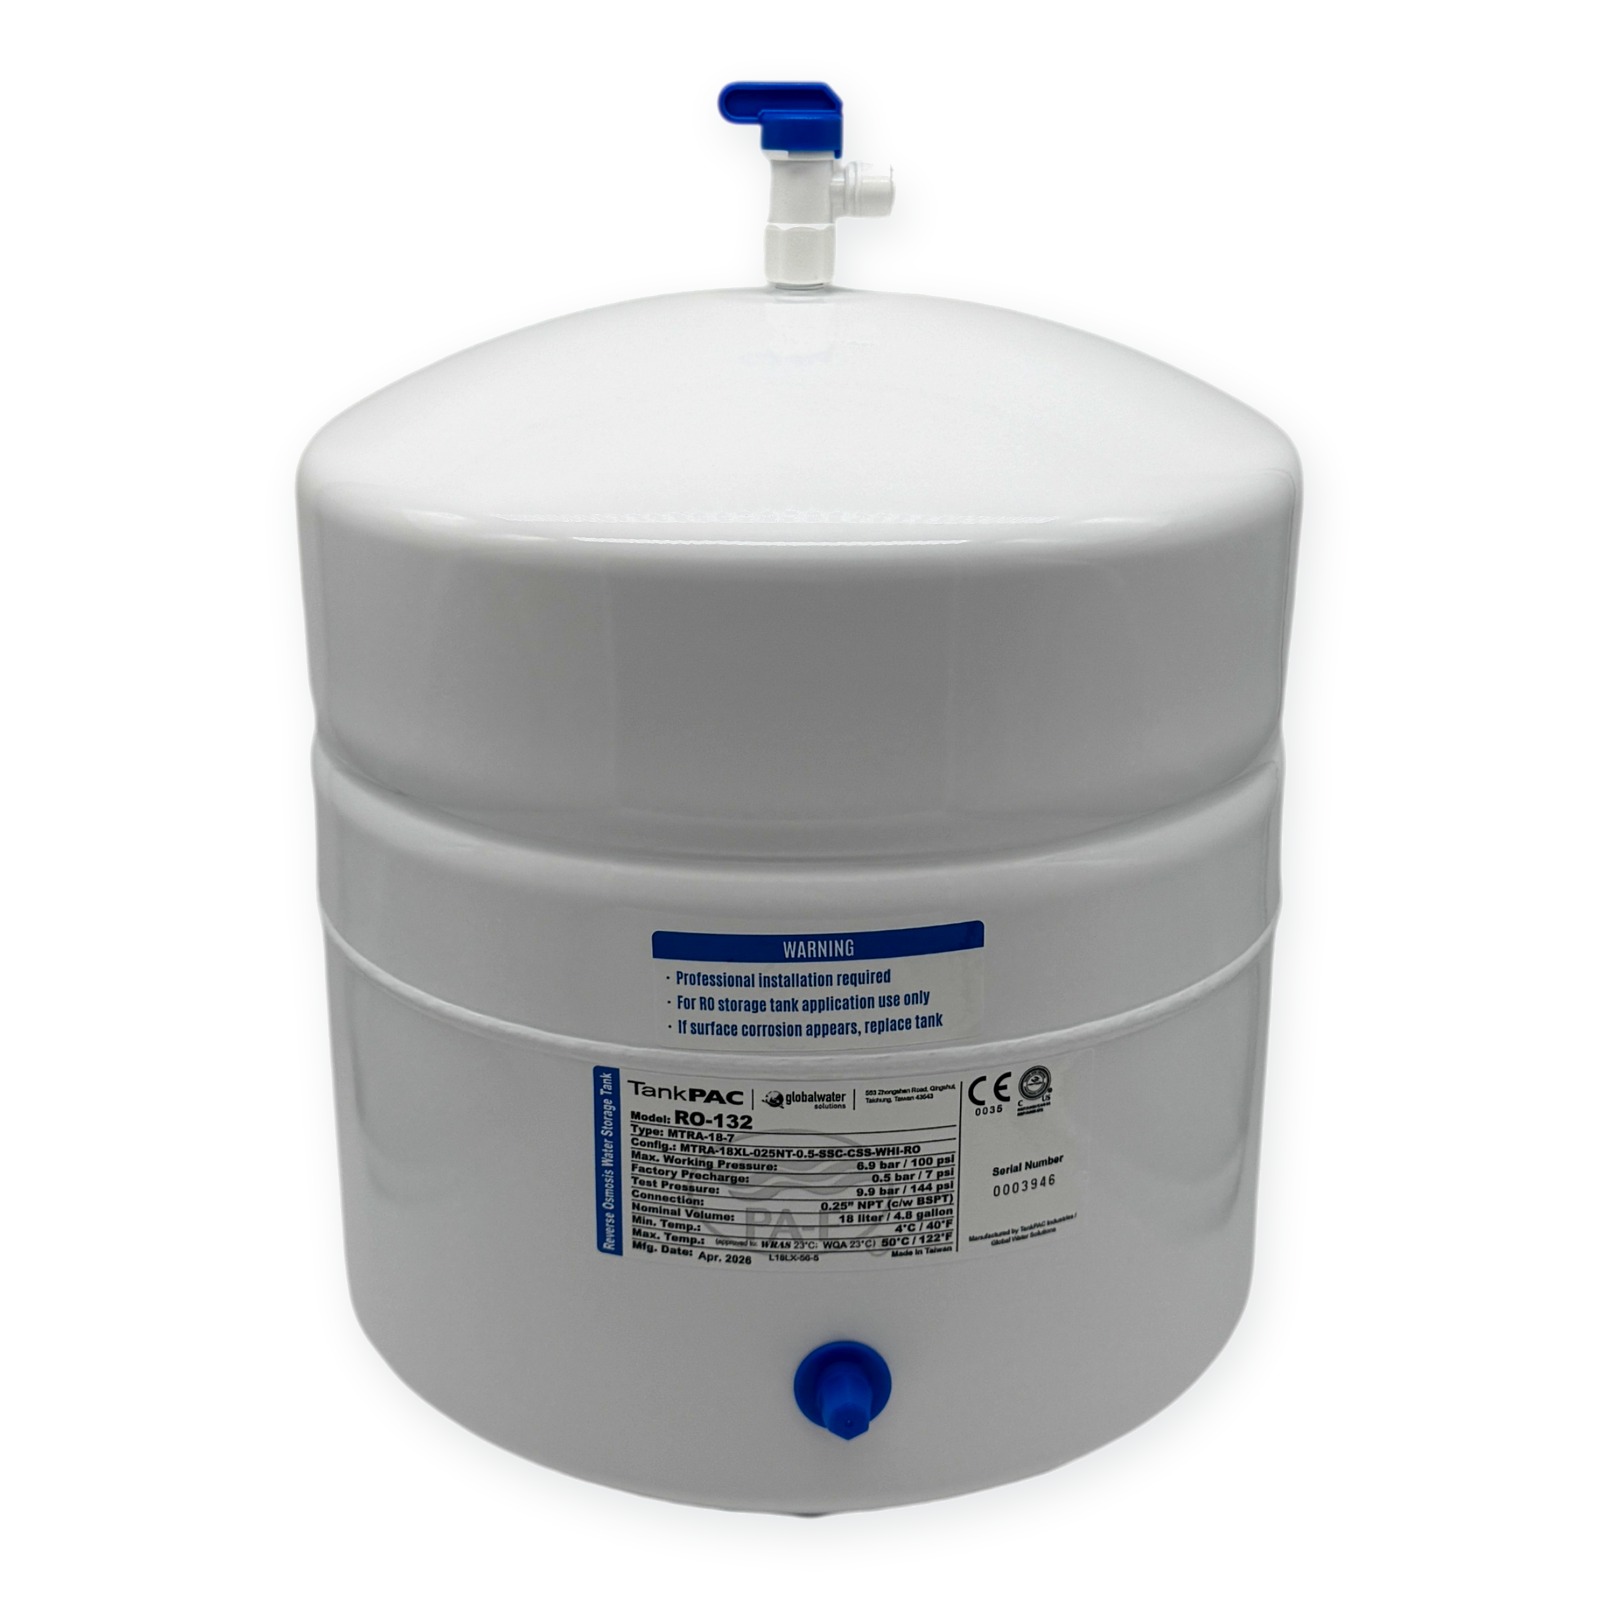
A complete RO storage tank kit — pressurized 4.5-gallon steel tank with food-grade bladder, a tank stand for stability, and a 1/4″ ball valve for shut-off. Everything you need to add or replace a storage tank on an under-sink reverse osmosis system.
This is a pressurized RO storage tank designed for under-sink reverse osmosis systems. The tank stores purified water under air pressure so you get instant flow at the faucet — even though the RO membrane produces water slowly, the tank delivers it on demand when you turn the tap.
It ships as a ready-to-install kit with the tank, a matching stand (keeps the tank upright and off the cabinet floor), and a 1/4″ ball valve that threads onto the tank’s top connection for easy shut-off during filter changes or maintenance. Manufactured by TankPAC / Globalwater (model RO-132), CE marked.
The tank uses a pressurized bladder system. The air side (pre-charged to ~7 PSI) pushes against the water side of the bladder. As the RO membrane produces purified water, it fills the bladder and compresses the air. When you open the faucet, the compressed air pushes the stored water out — delivering instant flow.
The auto shut-off valve in your RO system senses when the tank is full (back-pressure equals line pressure) and stops the membrane from producing. When you draw water and pressure drops, the membrane starts again automatically.
| Tank type | Pressurized RO storage tank (bladder type) |
| Total volume | 4.5 gallons (17 liters) |
| Usable capacity | ~3.0–3.2 gallons (varies with line pressure) |
| Pre-charge pressure | 5–7 PSI (factory set) |
| Max working pressure | 100 PSI |
| Max temperature | 100°F (38°C) — cold water only |
| Tank connection | 1/4″ FNPT (top port) |
| Ball valve | 1/4″ FPT × 1/4″ QC (included) |
| Shell material | Steel, powder-coated white |
| Interior | Food-grade butyl rubber bladder |
| Air charge valve | Schrader valve (bottom — standard bicycle-pump compatible) |
| Certifications | CE |
| Manufacturer | TankPAC / Globalwater (model RO-132) , Taiwan |
| Brand | TankPAC |
| SKU | RO-TANK-132 |
If water flow from the faucet becomes weak even though the tank feels heavy (full of water), the air pre-charge may have dropped. Close the ball valve, drain the tank through the faucet until empty, then re-pressurize the air side to 5–7 PSI through the bottom Schrader valve with a bicycle pump. This restores the “push” that delivers water to the faucet.
| Weight | 8 lbs |
|---|---|
| Dimensions | 15 × 11 × 11 in |
You must be logged in to post a review.
|
Continental U.S.: $7.95 Flat Rate · FREE Shipping $35+ · AK, HI & U.S. Territories: $14.95
|
Reviews
There are no reviews yet.