Free U.S. Continental Shipping on orders $35+ ● No Sales Tax outside California

MyWaterClub Product Support
150 GPD RO Membrane — 2012 TFC
TW-2012-150
Reverse osmosis membrane · fits standard 1812 housings
This page covers which systems the membrane fits, how to replace it step by step, when to change it, and what to do if something doesn’t look right.
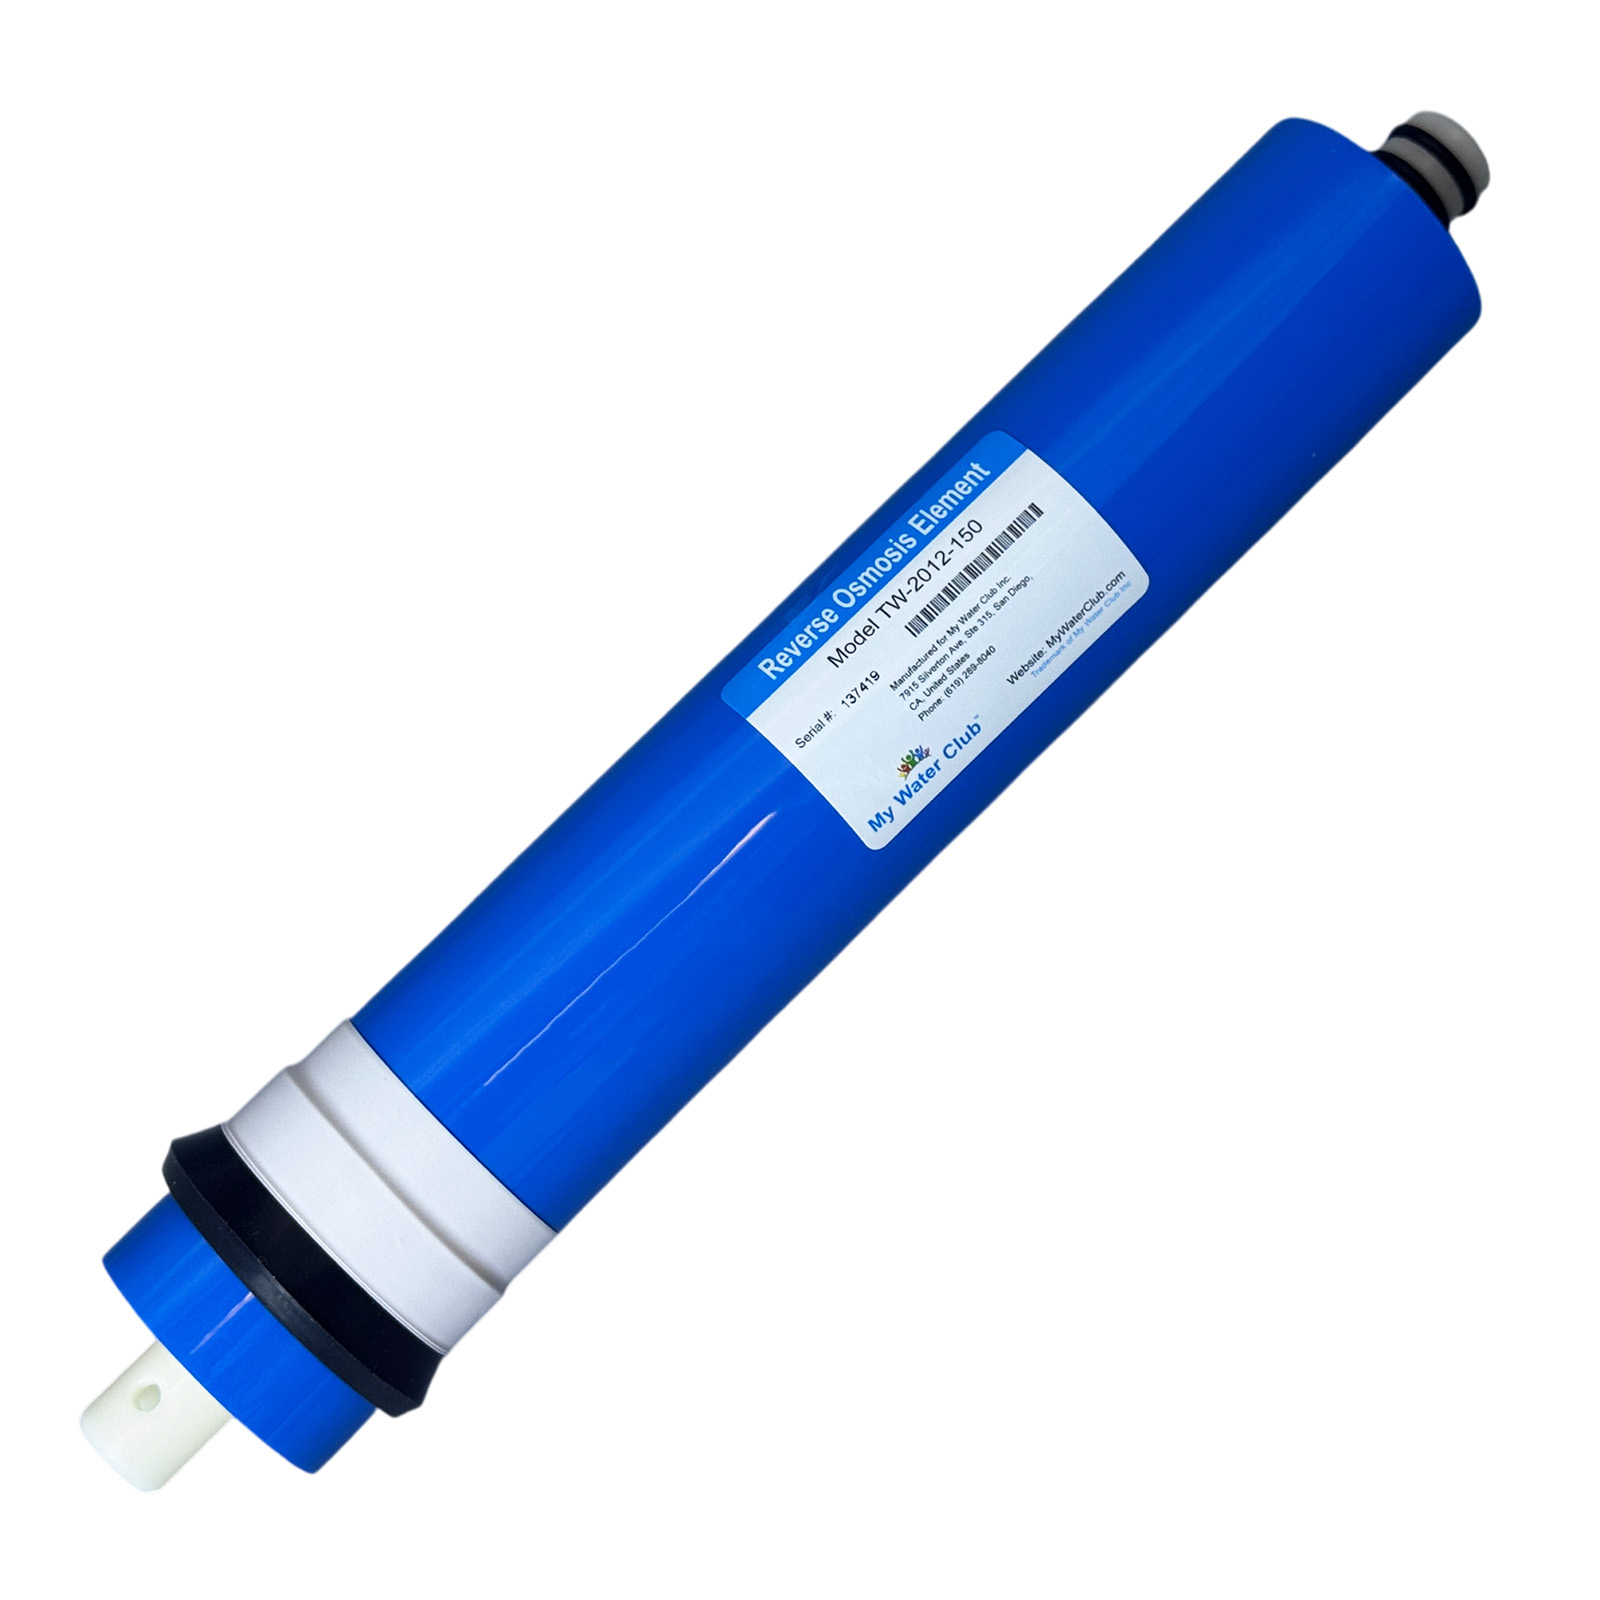
Is this your membrane?
Check these against the membrane in your hand.
- ✓A membrane about 12″ long — the same size as a standard 1812 membrane
- ✓A black rubber brine seal at one end and two O-rings on the center tube at the other
- ✓The label says 150 GPD or Model TW-2012-150 and My Water Club
150 GPD or another rating? Check your old membrane’s label
- 150 GPD — this membrane. High-flow 2012 membrane that fits the same standard 1812 housing as 75 and 100 GPD membranes, and makes about 50% more water per hour than 100 GPD.
- 100 GPD — the 1812 membrane MyWaterClub countertop systems ship with. 100 GPD membrane (TW-1812-100) →
- 75 GPD — 1812 size, for under-sink systems. 75 GPD membrane (TW-1812-75) →
- 250 GPD — 2012 size, the highest output. All RO membranes →
- Upgrading from 75 or 100 GPD? The small flow restrictor on the drain line is matched to the membrane rating, so a 150 GPD restrictor is recommended — ask us if you’re not sure which one you have.
Specifications
| Model / SKU | TW-2012-150 |
| Type | Thin-film composite (TFC), tap-water (TW) low-pressure membrane |
| Rating | 150 GPD — about 6.3 gal/hr (rated at about 77°F, 60 PSI and low-TDS water; real output is usually lower) |
| Size | 2012 high-flow · fits standard 1812 membrane housings, including all MyWaterClub housings |
| Seals | Brine seal and double O-rings pre-installed |
| Typical life | 2–3 years with good pre-filtration |
| Needs | Sediment and carbon pre-filters before it; chlorine must be removed before the membrane |
| Brand | MyWaterClub |
Reorder this membrane
This membrane · TW-2012-150
150 GPD RO Membrane, 2012 TFC
The same membrane you have now.
Where this membrane is used
| System | Where the membrane sits | Notes |
|---|---|---|
| MyWaterClub countertop RO CRO4T, CRO5DT, CRO5AT, 5MT |
The membrane housing after the pre-filters | An upgrade from the 100 GPD membrane the systems ship with — fills a glass or pitcher faster. Our housings accept 1812 and 2012 membranes. Use a matching 150 GPD flow restrictor. |
| Under-sink RO 4- or 5-stage, tank or tankless |
Stage 4: after the sediment and two carbon pre-filters, in the membrane housing | Fits standard 1812 membrane housings. Higher-output membranes need good water pressure: under about 50 PSI, a booster pump helps reach the rating. |
| Other RO systems | Any standard 1812 membrane housing | Not for capsule-style systems that use their own built-in membrane. |
Replaces these 150 GPD membranes
- ULP2012-150 and other standard 2012 150 GPD membranes
- MyWaterClub countertop RO (CRO4T, CRO5DT, CRO5AT, 5MT) — as an upgrade from 100 GPD, with a matching flow restrictor
- Systems with a 75 or 100 GPD membrane — as an upgrade in the same 1812 housing, with a matching flow restrictor
Not sure? Send us a photo of your old membrane and housing.
How to replace the membrane


Before you start
- You need: the new membrane, a towel, pliers to pull the old membrane, and a housing wrench if the cap is tight.
- Good time to change the sediment and carbon pre-filters too — they protect the new membrane.
- Keep the new membrane sealed in its bag until you are ready. Wash your hands first.
- Shut off the water. Close the feed valve to the RO system (and the tank valve on an under-sink system), then open the RO faucet to release pressure.
- Open the housing. If a tube connects to the cap, press the collet ring and pull the tube out. Unscrew the cap by hand or with the housing wrench.
- Pull out the old membrane with pliers by the center tube. Note which way it came out.
- Wet the O-rings on the new membrane with clean water so they slide in. Do not use petroleum grease.
- Push the new membrane in, double-O-ring end first, until it seats firmly. The brine seal end faces the cap. It takes a firm push — the end should sit flush, not stick out.
- Check the cap O-ring, screw the cap on hand-tight (snug with the wrench if needed) and reconnect any tube.
- Turn the water back on and check for leaks now, after 10 minutes and the next day.
- Flush before drinking: let the tank fill and drain it completely twice (discard the first two full tanks). On a countertop system, discard the first two full tanks of purified water.
- Write the date on the membrane housing or in your system manual.
First time? Search YouTube for “replace RO membrane under sink” — a short video makes the steps easy to follow. Countertop owners: follow your system’s manual for opening the cabinet.
Checking it with a TDS meter
- Wait one week after the change. New filters and a new membrane read high for the first days.
- Measure your tap water and the RO water the same day. Reduction = (tap − RO) ÷ tap. A healthy membrane typically reduces 95–99%.
- Measure right after the membrane if you have a remineralization or alkaline stage — those add minerals on purpose and raise the reading.
When to change your membrane
| Component | Typical interval | Change sooner if… |
|---|---|---|
| RO membrane | 2–3 years | TDS reduction drops below about 85–90%, or output stays slow after fresh pre-filters |
| Sediment and carbon pre-filters | 6–12 months | Output slows, or chlorine taste comes back |
Changing the pre-filters on time is the best way to make a membrane last.
Common questions
| What you’re seeing | Most likely cause |
|---|---|
| Slow water production | Clogged pre-filters, low water pressure (under about 40 PSI) or very cold water. Change the pre-filters first. |
| TDS high right after the change | Normal for the first days. Flush two tanks and test again after a week. |
| Leak at the housing cap | Cap O-ring twisted, dry or out of its groove. Release pressure, reseat it and re-tighten. |
| Membrane won’t go all the way in | Wet the O-rings and push straight and firmly. Make sure the O-ring end goes in first. |
| Water runs to the drain all the time | Normal while the tank fills. If it never stops, the shut-off valve or check valve may need service — contact us. |
| Water tastes flat | RO removes most minerals. A remineralization filter after the membrane adds some back. |
Related parts
| Part | Notes |
|---|---|
| RO membranes | Other ratings that fit the same housing |
| Carbon post filter (PAC-QC) | Final taste polish after the membrane |
| Inline filter guide | Remineralization, alkaline and other add-on stages |
Need help?
Call or text (858) 345-7345. Bought on Amazon? You can also reach us through Amazon: Your Orders › Contact seller.
About bacteria & microorganisms: because RO filters by size exclusion, it also reduces many particles down into the size range of bacteria and cysts. This membrane is not a certified microbiological purifier. Do not use it to make microbiologically unsafe water safe to drink — if you’re on an untested well or under a boil-water advisory, treat your water accordingly first.
Please note: Reduction performance and membrane life depend on your water chemistry, pressure, and usage, so results vary from home to home. This product is not certified to treat water of unknown quality and is not a substitute for testing your water. Descriptions use general, qualified language and are not health claims.