Free U.S. Continental Shipping on orders $35+ ● No Sales Tax outside California

MyWaterClub Product Support
Alkaline Multi-Media Inline Filter — 10″ × 2″, 3/8″ Quick Connect
ALC-FMB-QC38
Same SKU on Amazon
This page covers where the filter goes, how to install it, when to change it, how to test pH and TDS, and the parts that fit it.
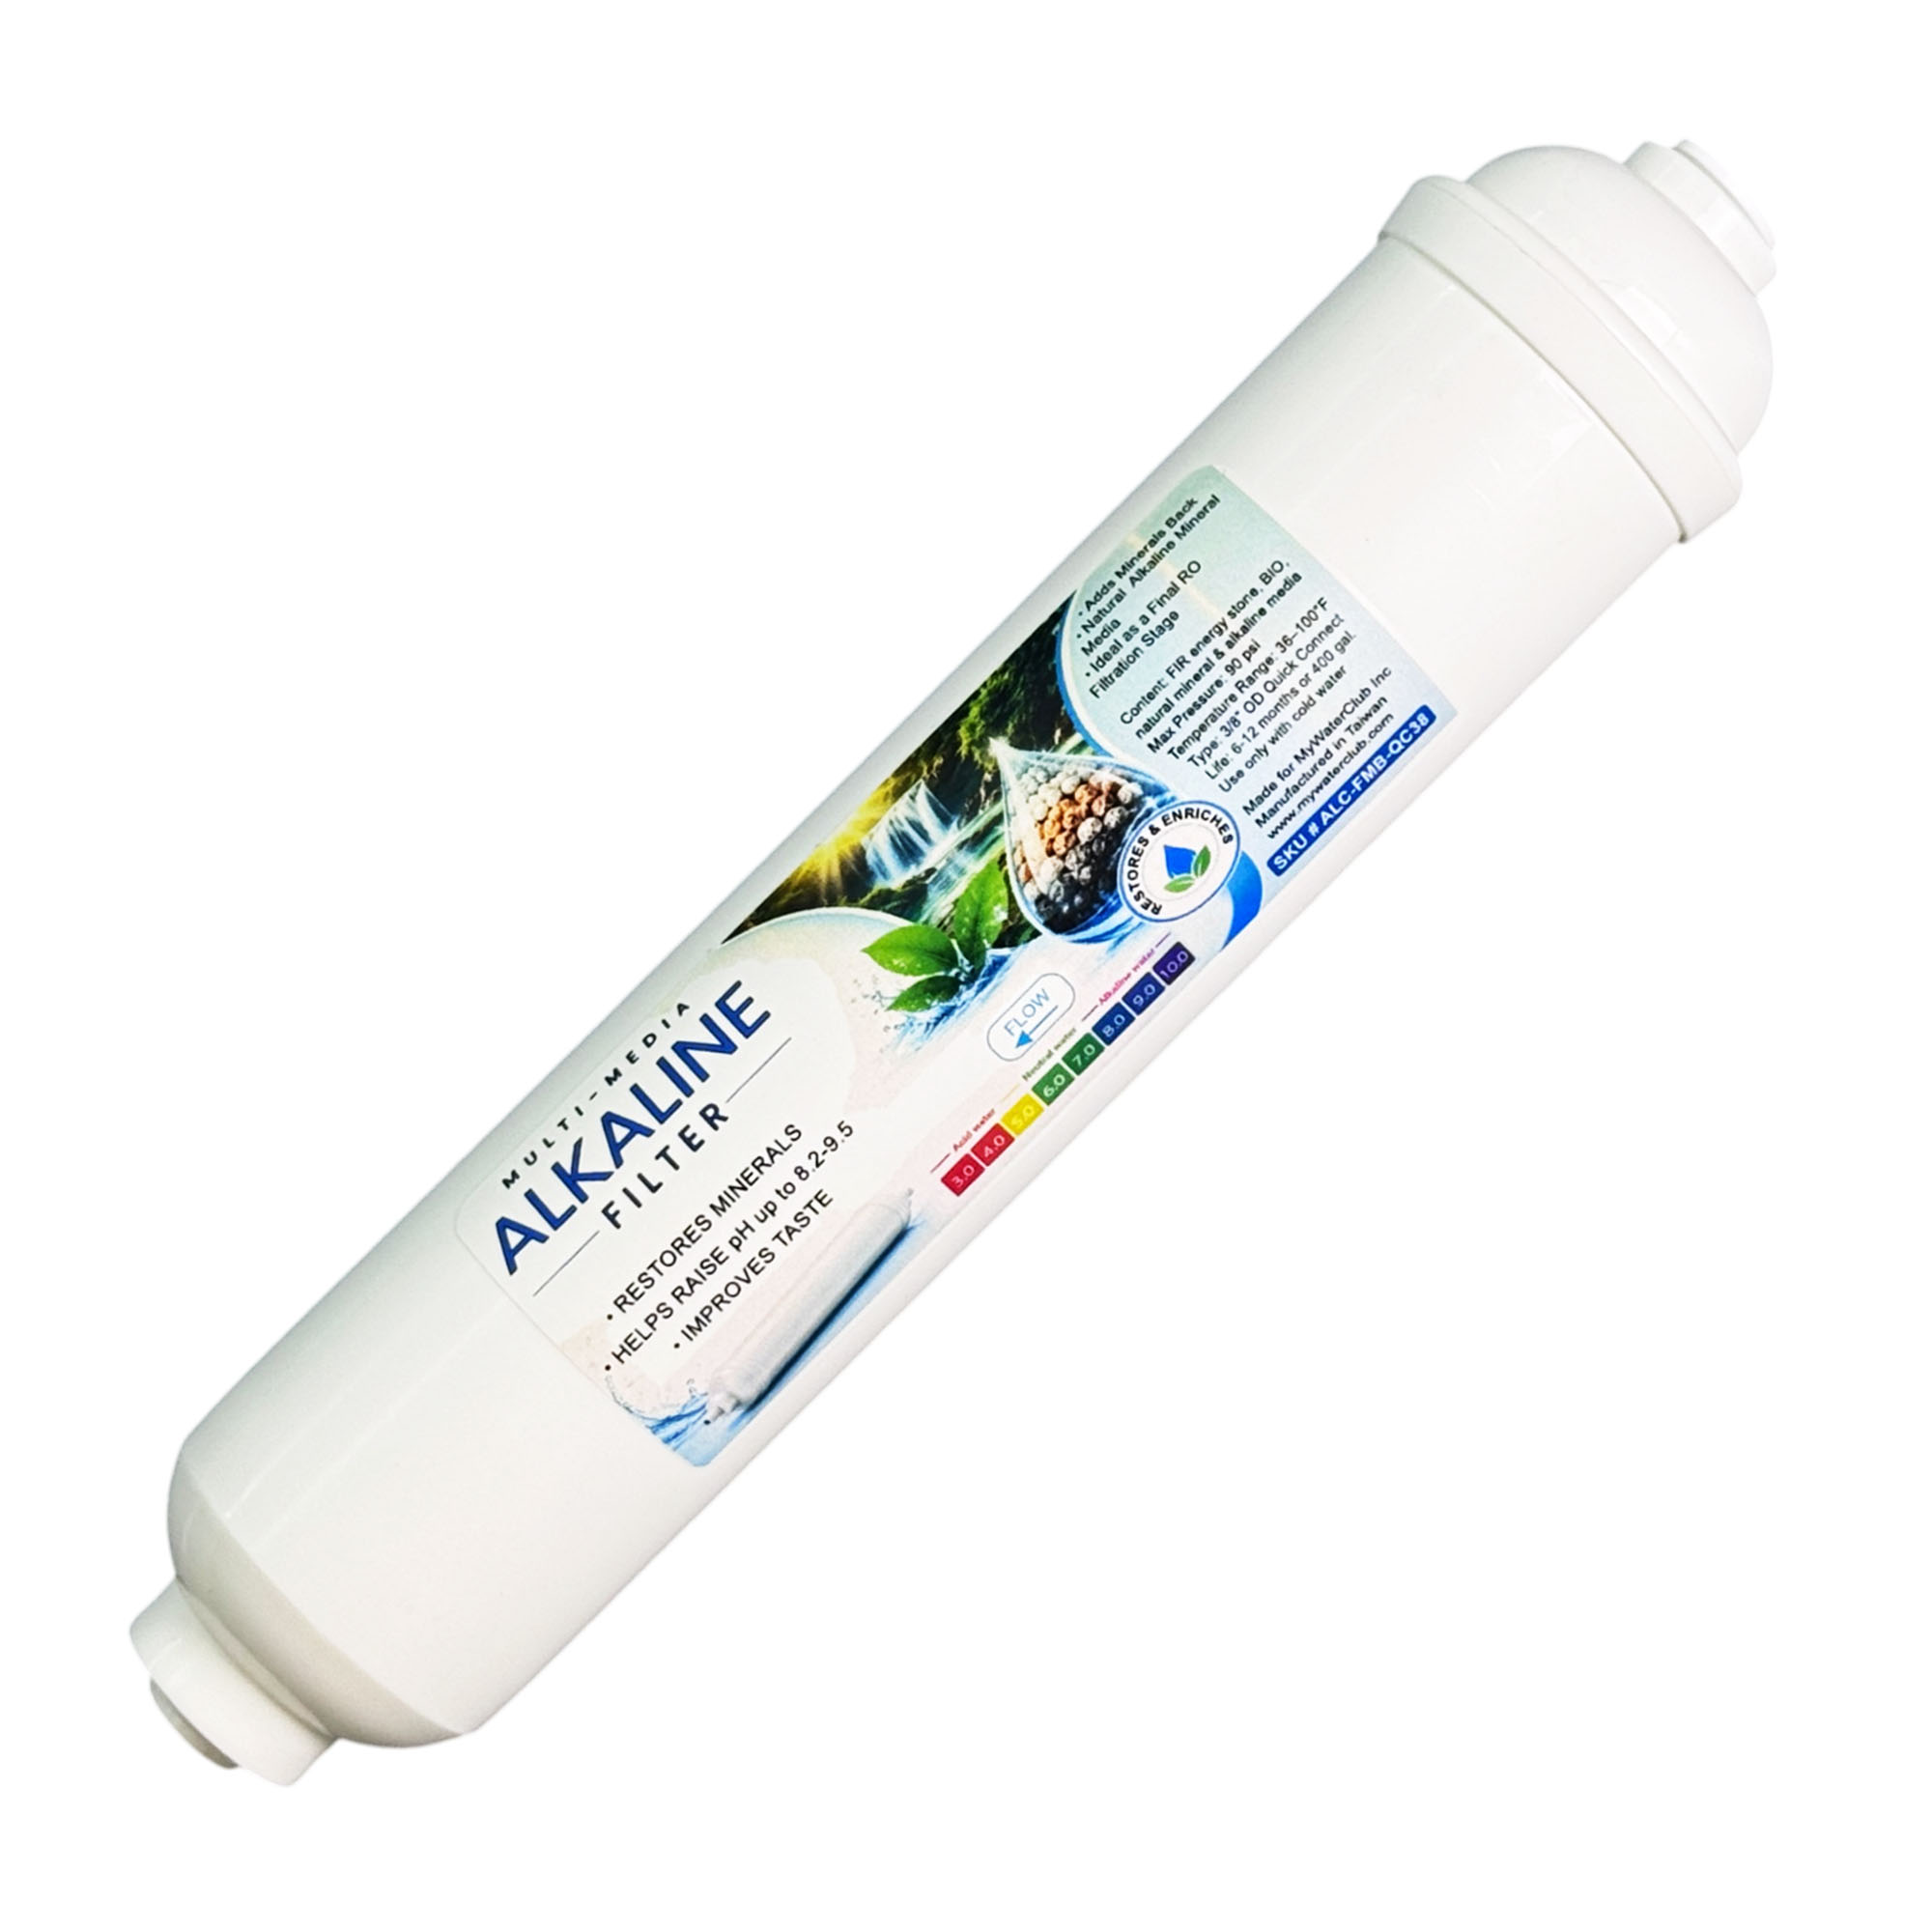
Is this your filter?
Check these against the filter in your hand. All four should match.
- ✓A white inline filter about 10″ long and 2″ across
- ✓The label says Multi-Media Alkaline Filter
- ✓3/8″ quick-connect ports at both ends and a FLOW arrow on the label
- ✓SKU # ALC-FMB-QC38 in the blue box on the label
Alkaline, mineral or carbon? Check the label
- Alkaline, 3/8″ ports — this page.
- Alkaline, 1/4″ ports (for countertop RO and 1/4″ tubing) — ALK-QC support page →
- 4-in-1 mineral / remineralization — a lower-pH filter with a different change schedule. 4-in-1 support page →
- Carbon, sediment, DI or specialty — see the full guide for all inline filters. Inline filter guide →
Specifications
| Model / SKU | ALC-FMB-QC38 (website and Amazon) |
| Media | Multi-media blend: far-infrared ceramic, bio ceramic, natural mineral and alkaline media |
| What it does | Adds minerals back to RO water and helps raise its pH, up to about 8.2–9.5, for a smoother taste (varies with source water, flow and contact time) |
| Size | 10″ × 2″ |
| Connection | 3/8″ quick connect, for 3/8″ OD tubing |
| Pressure / temperature | Max 90 PSI · 36–100°F, cold water only |
| Typical life | 6–12 months, or 400 gallons |
| Made in | Taiwan |
| Brand | MyWaterClub |
Reorder this filter
This filter · ALC-FMB-QC38
Alkaline Multi-Media Inline Filter, 3/8″ Quick Connect
Buy one at a time or stock up. The price per filter drops when you buy more.
Where it goes
An alkaline filter is always the last stage, and it is for RO water only. It adds minerals back after the RO membrane has removed them. Its 3/8″ ports suit under-sink RO systems with 3/8″ tubing; countertop RO systems use 1/4″ tubing and need the 1/4″ version.
| Your setup | Order of stages |
|---|---|
| Under-sink RO | Pre-filters → RO membrane → storage tank → carbon post filter → alkaline filter → faucet |
| Fridge or ice maker line | Only when the line is fed by RO water: RO system → alkaline filter → appliance |
Where not to use it
- On a plain tap water line — tap water already has minerals.
- On an air humidifier — added minerals leave white dust.
- Before the RO membrane — the membrane would remove what the filter adds.
- Before any carbon filter, including the carbon post filter — carbon takes out part of the minerals this filter adds. Put the alkaline filter after it.
Connections
Before you cut anything
- Check your tubing size. It is either 1/4″ OD or 3/8″ OD, usually printed on the tubing. Use the matching adapters. Never force 1/4″ tubing into a 3/8″ port, or the reverse.
- Water must flow the way the arrow on the label points.
- You need a tubing cutter (or a sharp utility knife), a towel and a small bucket.
- 3/8″ tubing goes straight into the filter’s quick-connect ports. Have 1/4″ tubing? Use the 1/4″ alkaline filter instead.
- Cut the tubing square. A 90° cut. A cut off by about 15° or more will leak. The last inch should be round, smooth and free of scratches.
- Remove any blue C-clips from the adapters. A clip left in stops the tube from seating.
- Push the tube in until it stops, then pull gently to confirm it holds.
- Refit the blue C-clips on every quick-connect port.
To remove a tube later: turn off the water and release pressure, take off the C-clip, push the collar in toward the filter and pull the tube out while holding the collar.
Installing on an under-sink RO
First time? Watching a short video helps: search YouTube for “add inline filter to RO system”.
- Shut off the RO water supply and the tank valve, then open the RO faucet to release pressure.
- Find the spot: after the storage tank and the carbon post filter, right before the faucet.
- Check that the tubing is 3/8″ OD, then cut it square over a towel.
- Connect the filter with the FLOW arrow pointing toward the faucet, and refit the C-clips.
- Secure the filter with a clip: a 2.5″ × 2″ clip onto the membrane housing, or a 2″ × 2″ clip onto another inline filter.
- Open the supply and tank valves. Check for leaks now, after 10 minutes, and the next day.
- Flush the new filter for at least 5 minutes with the RO faucet open. Let the tank fill, then discard the first full tank.
- Write the install date on the label.
Countertop RO: these systems use 1/4″ tubing, so use the 1/4″ alkaline filter. It goes last, after the carbon post filter.
When to change your filter
| Filter | Typical interval | Change sooner if… |
|---|---|---|
| Alkaline filter | 6–12 months or 400 gallons |
The pH falls back toward plain RO water |
Intervals are typical estimates. Your source water, flow and usage set the real schedule.
Testing pH and TDS
- Wait one week after installing a new filter. The first water through an alkaline filter reads much higher than normal.
- TDS goes up after this filter. That is expected — it adds minerals. Measure TDS right after the RO membrane to judge the membrane.
- pH: plain RO water is usually slightly acidic, about 6–7. This filter helps raise it, up to about 8.2–9.5. Run the water for a minute and test right away, because RO water’s pH drops within minutes in an open cup.
- Use a calibrated pH meter. Calibrate it with pH 7 and pH 4 or pH 10 buffer solutions before you test. pH strips and test drops are not accurate enough in low-mineral RO water, so we don’t recommend them.
Full testing steps in the inline filter guide → · Digital pH meter →
Parts that fit this filter
| Part | Notes |
|---|---|
| Coconut carbon block post filter, 3/8″ QC (CB5-QC38) | Goes right before the alkaline filter · all inline carbon filters |
| Blue C-clips for 3/8″, 10-pack | Locks the tube in a 3/8″ port · clips for 1/4″ ports |
| 2.5″ × 2″ mounting clips, 2-pack | Clips the filter onto an RO membrane housing · 2″ × 2″ clips · 2″ screw-mount clips |
| Tubing cutter with release tool | Square cuts on 1/4″ and 3/8″ tubing |
| 3/8″ OD tubing, white | If you need extra length · 1/4″ tubing |
All tubing, clips and fittings →
Common questions
| What you’re seeing | Most likely cause |
|---|---|
| Cloudy or milky water from a new filter | Fine mineral particles or trapped air. Flush for at least 5 minutes; bubbles clear within a day or two. |
| Drip at a quick-connect port | Tube not fully in, scratched or cut at an angle, or the C-clip was left in. Release, recut square, push it fully in and refit the clip. |
| Low flow at the faucet | Filter installed backward, kinked tubing, or a filter past its date. Check the arrow, the tubing and the install date. |
| TDS is higher after this filter | Expected — the filter adds minerals. Judge the RO membrane by testing before this filter. |
| pH readings jump around | Normal in low-mineral water. Calibrate the meter, stir gently and wait for the reading to settle. |
| pH is back near plain RO water | The alkaline media is used up. Time for a new filter. |
Need help?
Contact us
Send a photo of the filter label and your system, and we’ll tell you where it goes
Call or text (858) 345-7345. Bought on Amazon? You can also reach us through Amazon: Your Orders › Contact seller.
Scope note: This is a taste and mineral step for RO water, not a contaminant filter. It does not reduce chlorine, sediment or fluoride. Use it on municipally treated or otherwise microbiologically safe water. Descriptions refer to taste and mineral content only and are not health claims.
Please note: pH, mineral levels and filter life depend on your source water, flow rate, contact time and usage, so results vary from home to home. This product is not a substitute for testing your water.