Free U.S. Continental Shipping on orders $35+ ● No Sales Tax outside California

MyWaterClub Product Support
5 Micron Inline Sediment Pre-Filter — 10″ × 2″
SED-QC
Amazon: SED5-QC
This page covers where the filter goes, how to install it, when to change it, and the parts that fit it.
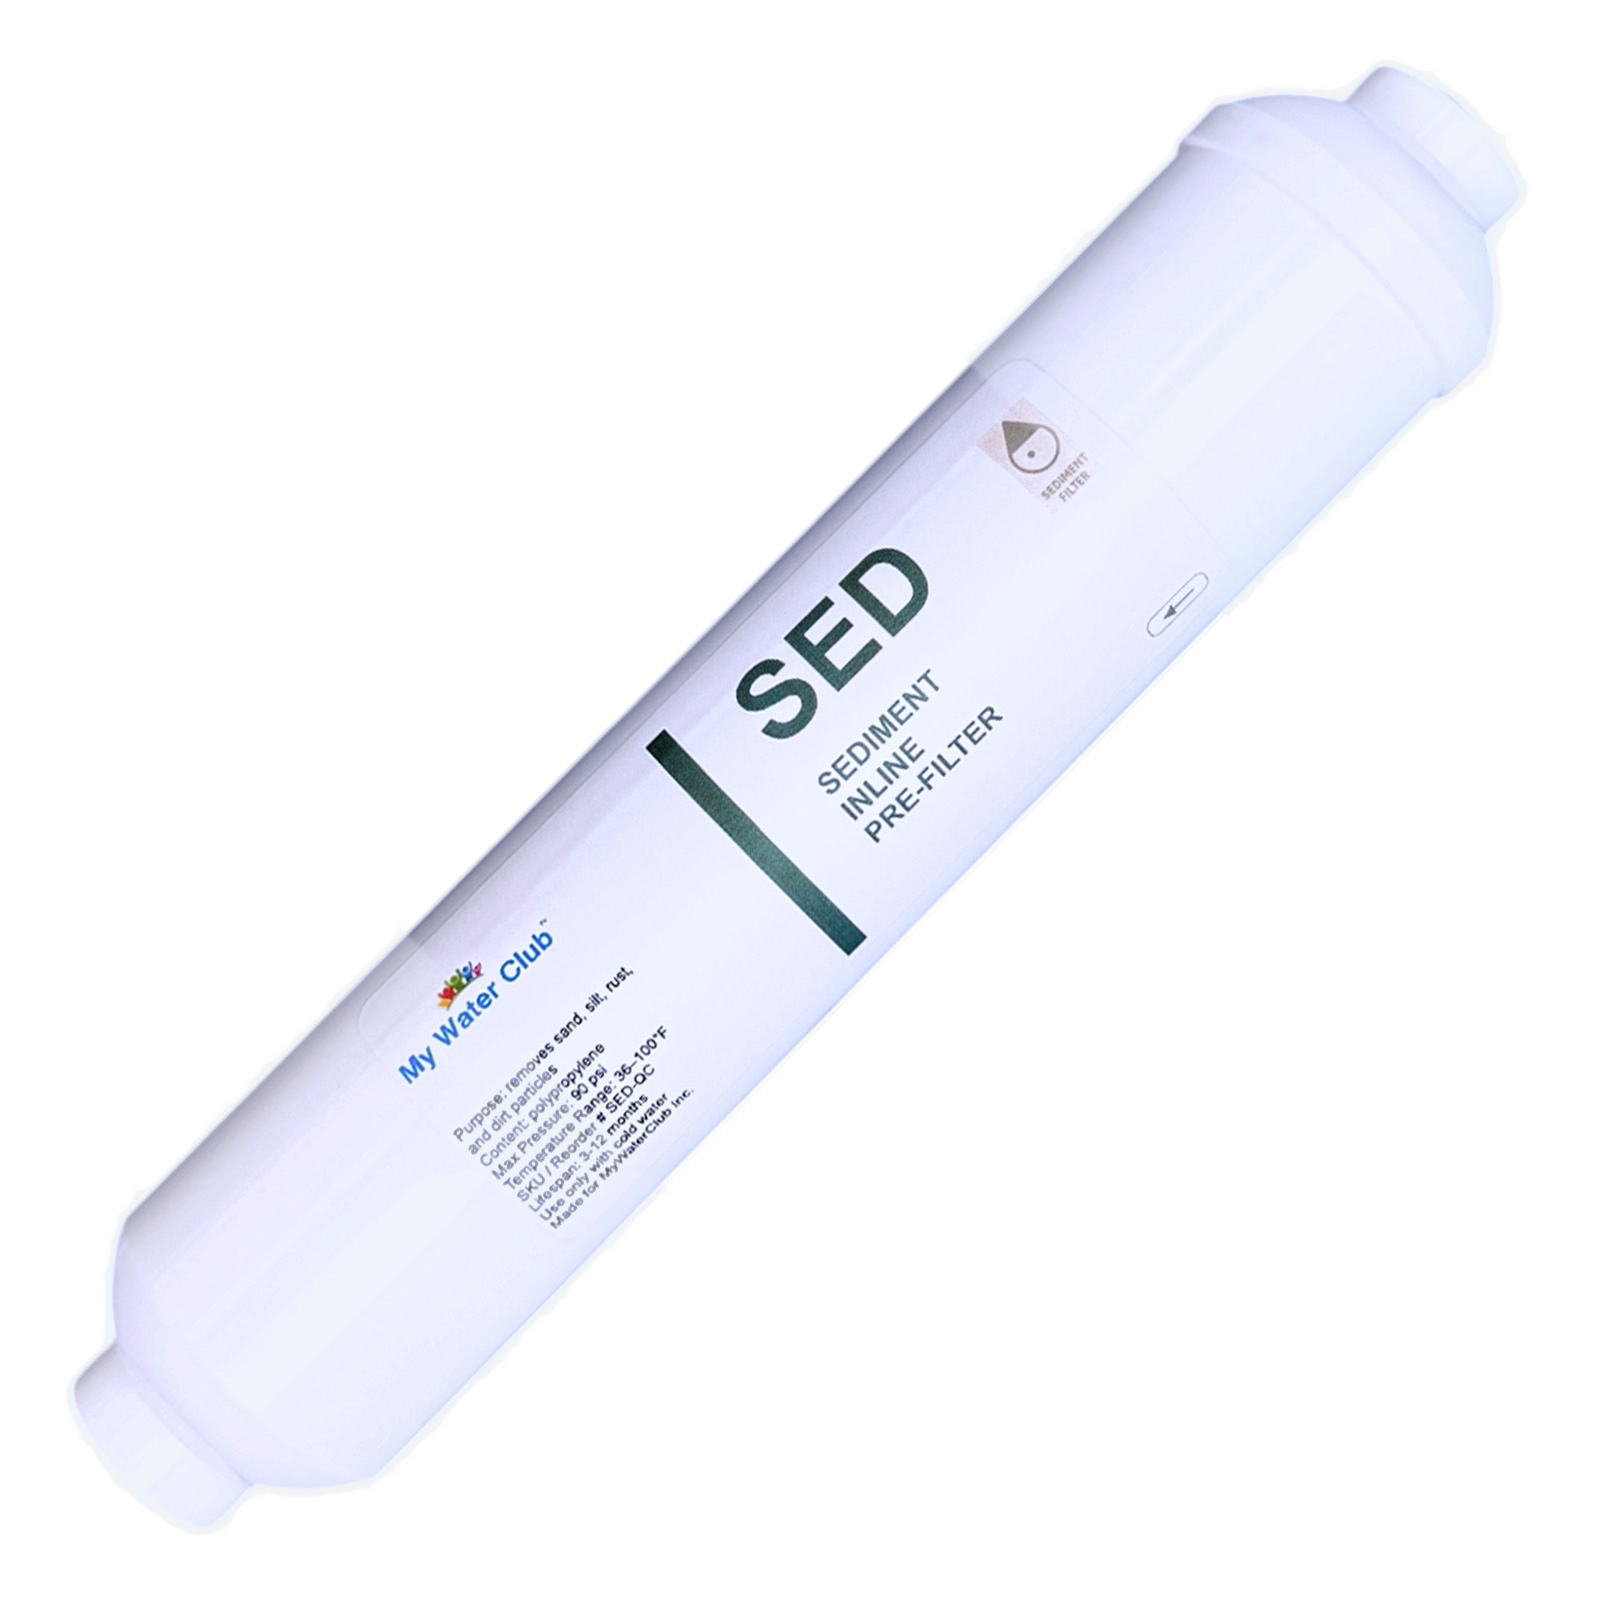
Is this your filter?
Check these against the filter in your hand. All four should match.
- ✓A white inline filter about 10″ long and 2″ across
- ✓The label says SED — sediment inline pre-filter
- ✓1/4″ quick-connect ports at both ends and a FLOW arrow on the label
- ✓A molded FLOW arrow on the back of the filter body
Is a sediment filter what you need?
- Grit, sand, rust or cloudy particles — this page.
- Chlorine taste or odor — that needs a carbon filter, usually right after this one. Inline carbon filters →
- Other inline filters (DI, mineral, alkaline, specialty) — see the full guide. Inline filter guide →
Specifications
| Model / SKU | SED-QC · Amazon: SED5-QC |
| Media | Melt-blown polypropylene, 5 µm nominal |
| What it does | Traps sand, silt, rust and dirt particles. It does not reduce chlorine, taste, odor or dissolved solids. |
| Size | 10″ × 2″ |
| Connection | 1/4″ quick connect, for 1/4″ OD tubing |
| Pressure / temperature | Max 90 PSI · 36–100°F, cold water only |
| Typical life | 3–12 months (sooner on dirty or well water) |
| Brand | MyWaterClub |
Reorder this filter
This filter · SED-QC
5 Micron Inline Sediment Pre-Filter
Buy one at a time or stock up. The price per filter drops when you buy more.
Where it goes
A sediment filter is always the first stage. It catches grit before it reaches carbon filters, valves and appliances.
| Your setup | Order of stages |
|---|---|
| Fridge or ice maker line | Cold water line → sediment filter → carbon filter → fridge or ice maker |
| Coffee maker or water cooler | Cold water line → sediment filter → carbon filter → appliance |
| Countertop RO | Faucet adapter → sediment filter → carbon → RO membrane → carbon post filter |
Where you don’t need it
- Under-sink RO systems — they already have a large sediment stage.
- Hot water lines — cold water only, 36–100°F.
Connections
Before you cut anything
- Check your tubing size. It is either 1/4″ OD or 3/8″ OD, usually printed on the tubing. Use the matching adapters. Never force 1/4″ tubing into a 3/8″ port, or the reverse.
- Water must flow the way the arrow on the label points.
- You need a tubing cutter (or a sharp utility knife), a towel and a small bucket.
- 1/4″ tubing goes straight into the filter’s quick-connect ports. For 3/8″ tubing, add a 3/8″ elbow adapter (see “Parts”) to each port first.
- Cut the tubing square. A 90° cut. A cut off by about 15° or more will leak. The last inch should be round, smooth and free of scratches.
- Remove any blue C-clips from the adapters. A clip left in stops the tube from seating.
- Push the tube in until it stops, then pull gently to confirm it holds.
- Refit the blue C-clips on every quick-connect port.
To remove a tube later: turn off the water and release pressure, take off the C-clip, push the collar in toward the filter and pull the tube out while holding the collar.
Installing on a water line
For a fridge, ice maker, coffee maker or water cooler line. Expect a few drops when you cut the tubing.
- Turn off the water to the line, then open a faucet to release pressure.
- Pick a straight section of tubing with room for the filter and gentle bends. Check that the tubing is 1/4″ OD.
- Put a towel and a small bucket underneath, then cut the tubing square.
- Remove any blue C-clips. Push the supply-side tube into the filter until it stops, and tug to check. The FLOW arrow points toward the appliance.
- Flush the filter for at least 5 minutes into the bucket or a sink.
- Connect the outlet side to the appliance line and refit the C-clips on both ports.
- Turn the water on. Dry the fittings and check for leaks now, after 10 minutes, and the next day.
- Secure the filter with 2″ screw-mount clips so its weight doesn’t pull on the tubing, and write the install date on the label.
Countertop RO: follow your system’s manual. This filter is the first stage, right after the faucet adapter. Flush it for at least 5 minutes before using the water.
When to change your filter
| Filter | Typical interval | Change sooner if… |
|---|---|---|
| Sediment pre-filter | 3–12 months up to 12 months on clean city water |
Flow drops, or the filter looks dark through the ports. High-sediment or well water clogs it sooner. |
A TDS meter won’t tell you when to change a sediment filter — it doesn’t change dissolved solids. Go by the flow and the calendar.
Parts that fit this filter
| Part | Notes |
|---|---|
| 1/4″ stem × 3/8″ quick-connect elbow, 2-pack | Adapters for 3/8″ tubing |
| Inline carbon filters | Goes right after the sediment filter, for chlorine taste and odor |
| Blue C-clips for 3/8″, 10-pack | Locks the tube in a 3/8″ port · clips for 1/4″ ports |
| 2.5″ × 2″ mounting clips, 2-pack | For RO housings · 2″ screw-mount clips for a wall or cabinet · 2″ × 2″ clips |
| Tubing cutter with release tool | Square cuts on 1/4″ and 3/8″ tubing |
| 3/8″ OD tubing, white | If you need extra length · 1/4″ tubing |
All tubing, clips and fittings →
Common questions
| What you’re seeing | Most likely cause |
|---|---|
| Low flow | The filter is clogged, installed backward, or the tubing is kinked. Check the arrow and the tubing, and replace the filter if it’s past its date. |
| Water still tastes of chlorine | Expected. A sediment filter doesn’t reduce chlorine. Add a carbon filter after it. |
| Cloudy water right after installing | Air in the line. It clears after a few minutes of running water. |
| Drip at a quick-connect port | Tube not fully in, scratched or cut at an angle, or the C-clip was left in. Release, recut square, push it fully in and refit the clip. |
| TDS reading didn’t change | Expected. Sediment filters don’t remove dissolved solids. |
| The filter darkens in a few weeks | Heavy sediment in your water. Change it more often, or add a larger whole-house sediment filter at the main line. |
Need help?
Contact us
Send a photo of the filter label and your setup, and we’ll tell you where it goes
Call or text (858) 345-7345. Bought on Amazon? You can also reach us through Amazon: Your Orders › Contact seller.
Scope note: This is a sediment filter. It reduces particles such as sand, silt and rust. It does not reduce chlorine, chloramine, taste, odor, hardness or dissolved solids, and it is not a certified microbiological purifier. Use it on municipally treated or otherwise microbiologically safe water.
Please note: Filter life depends on your water quality, pressure and usage, so results vary from home to home. This product is not certified to treat water of unknown quality and is not a substitute for testing your water.